Follow Me On Social Media!

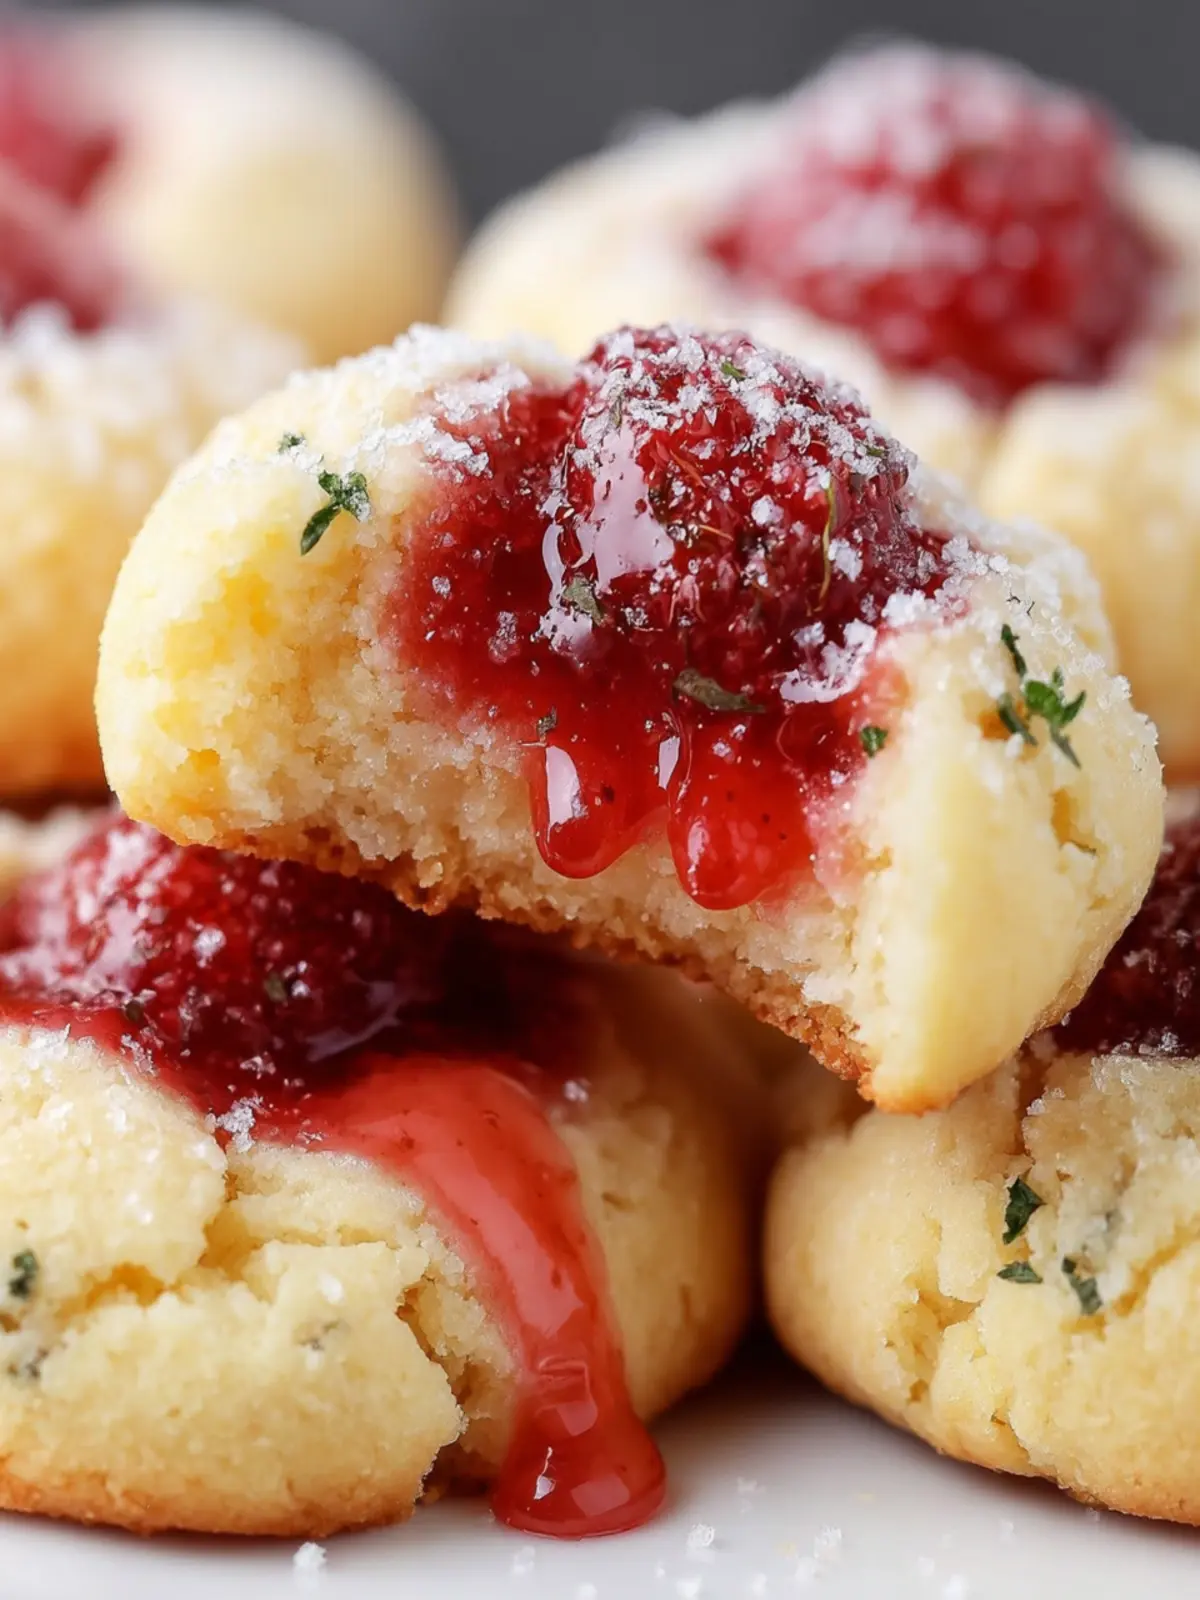
Raspberry Thumbprint Cookies: Irresistibly Chewy Delights
Introduction to Raspberry Thumbprint Cookies
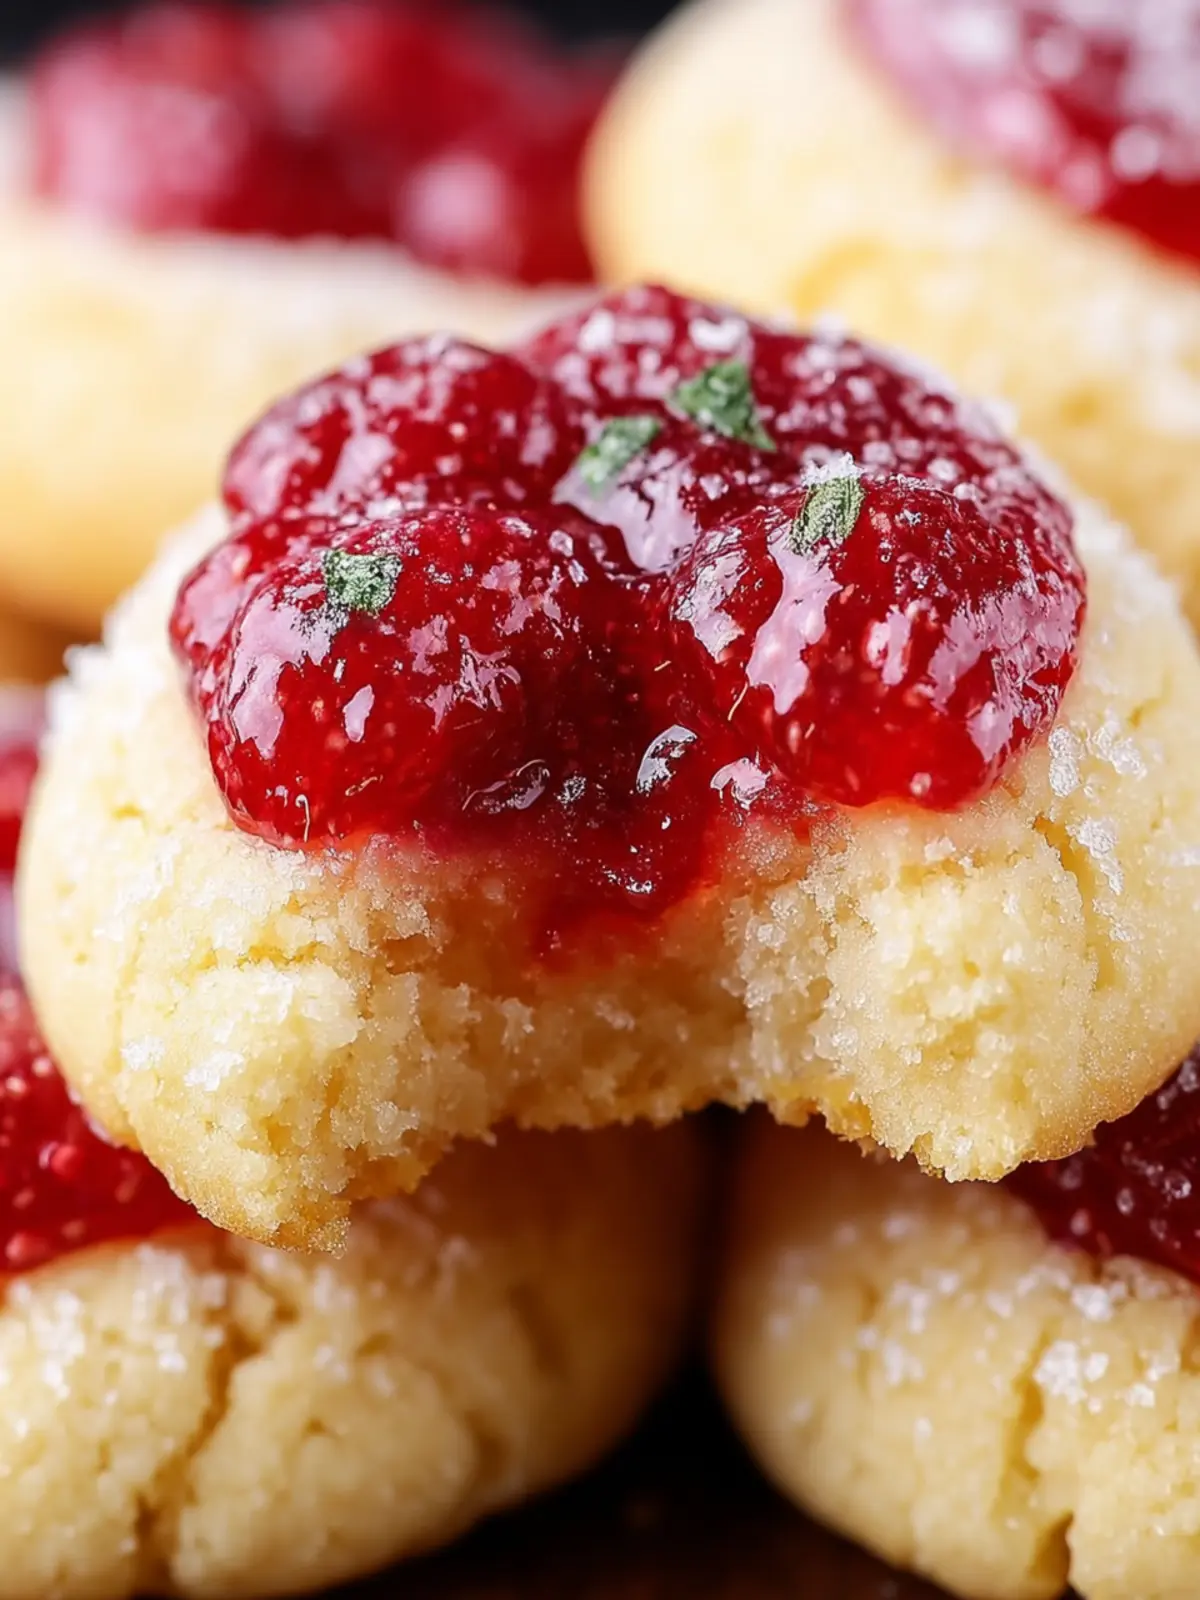
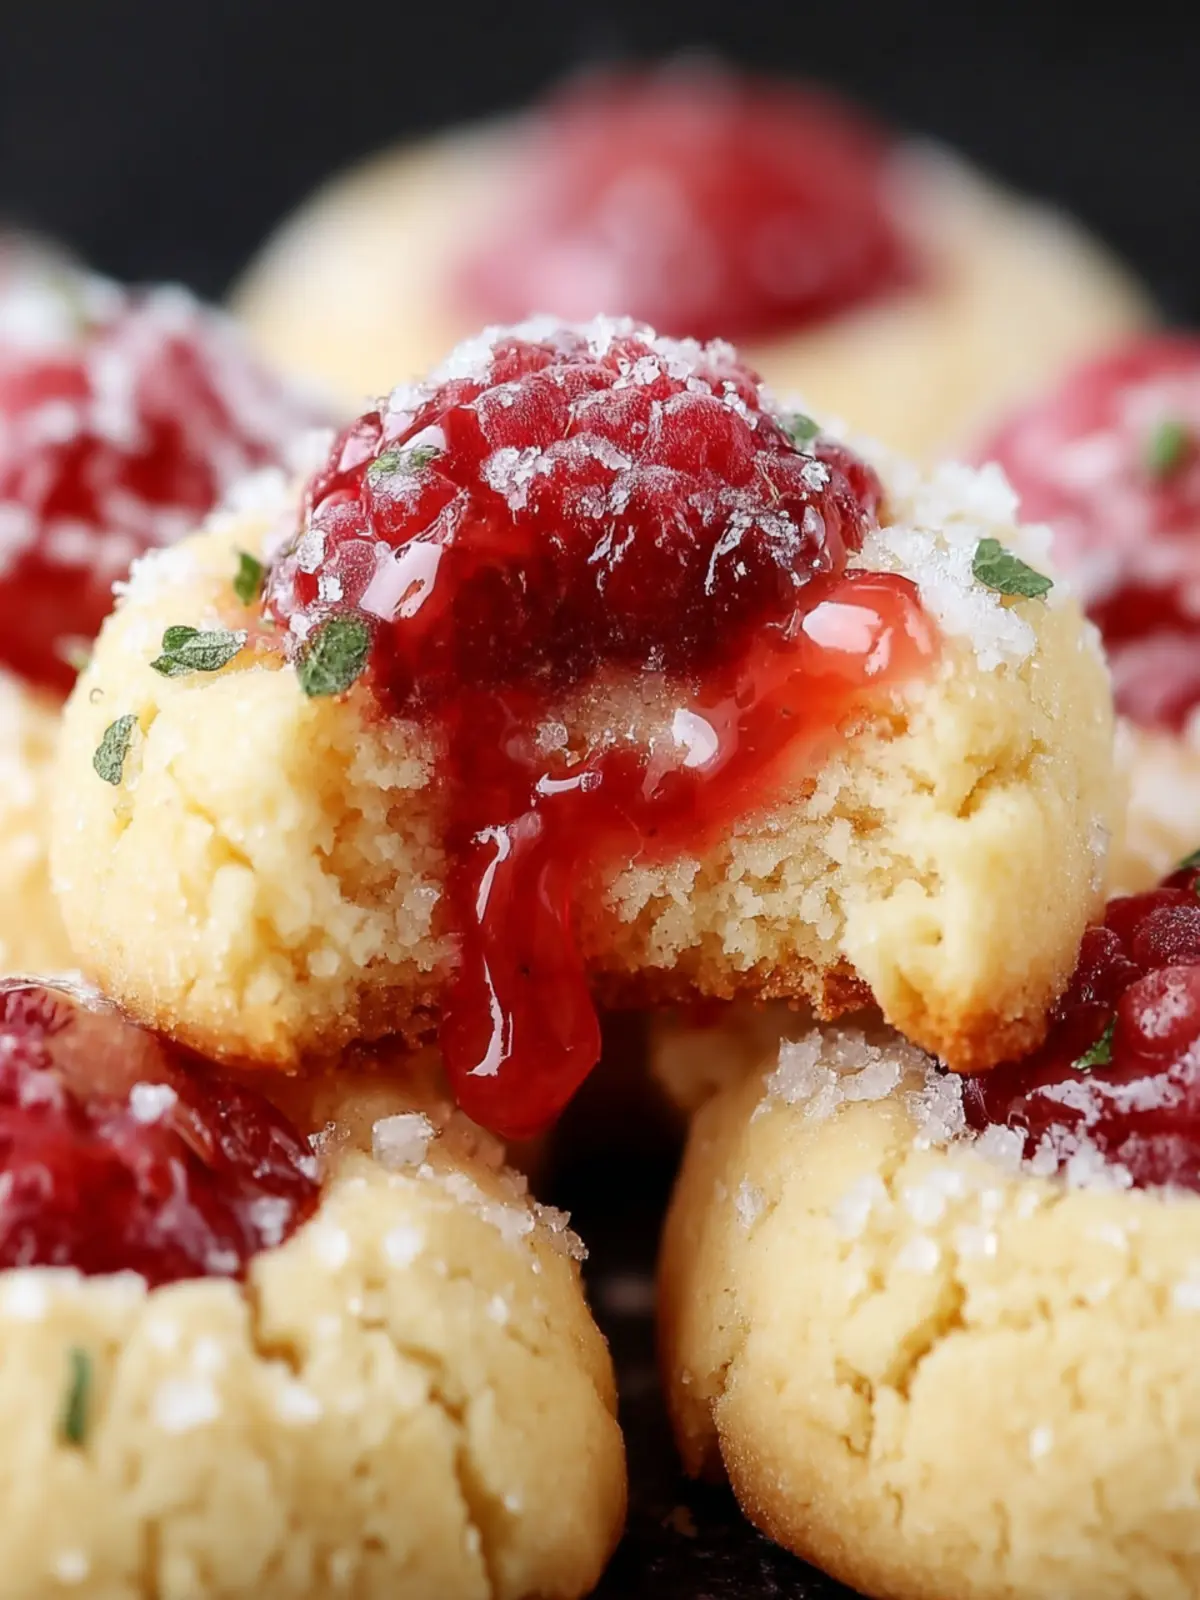
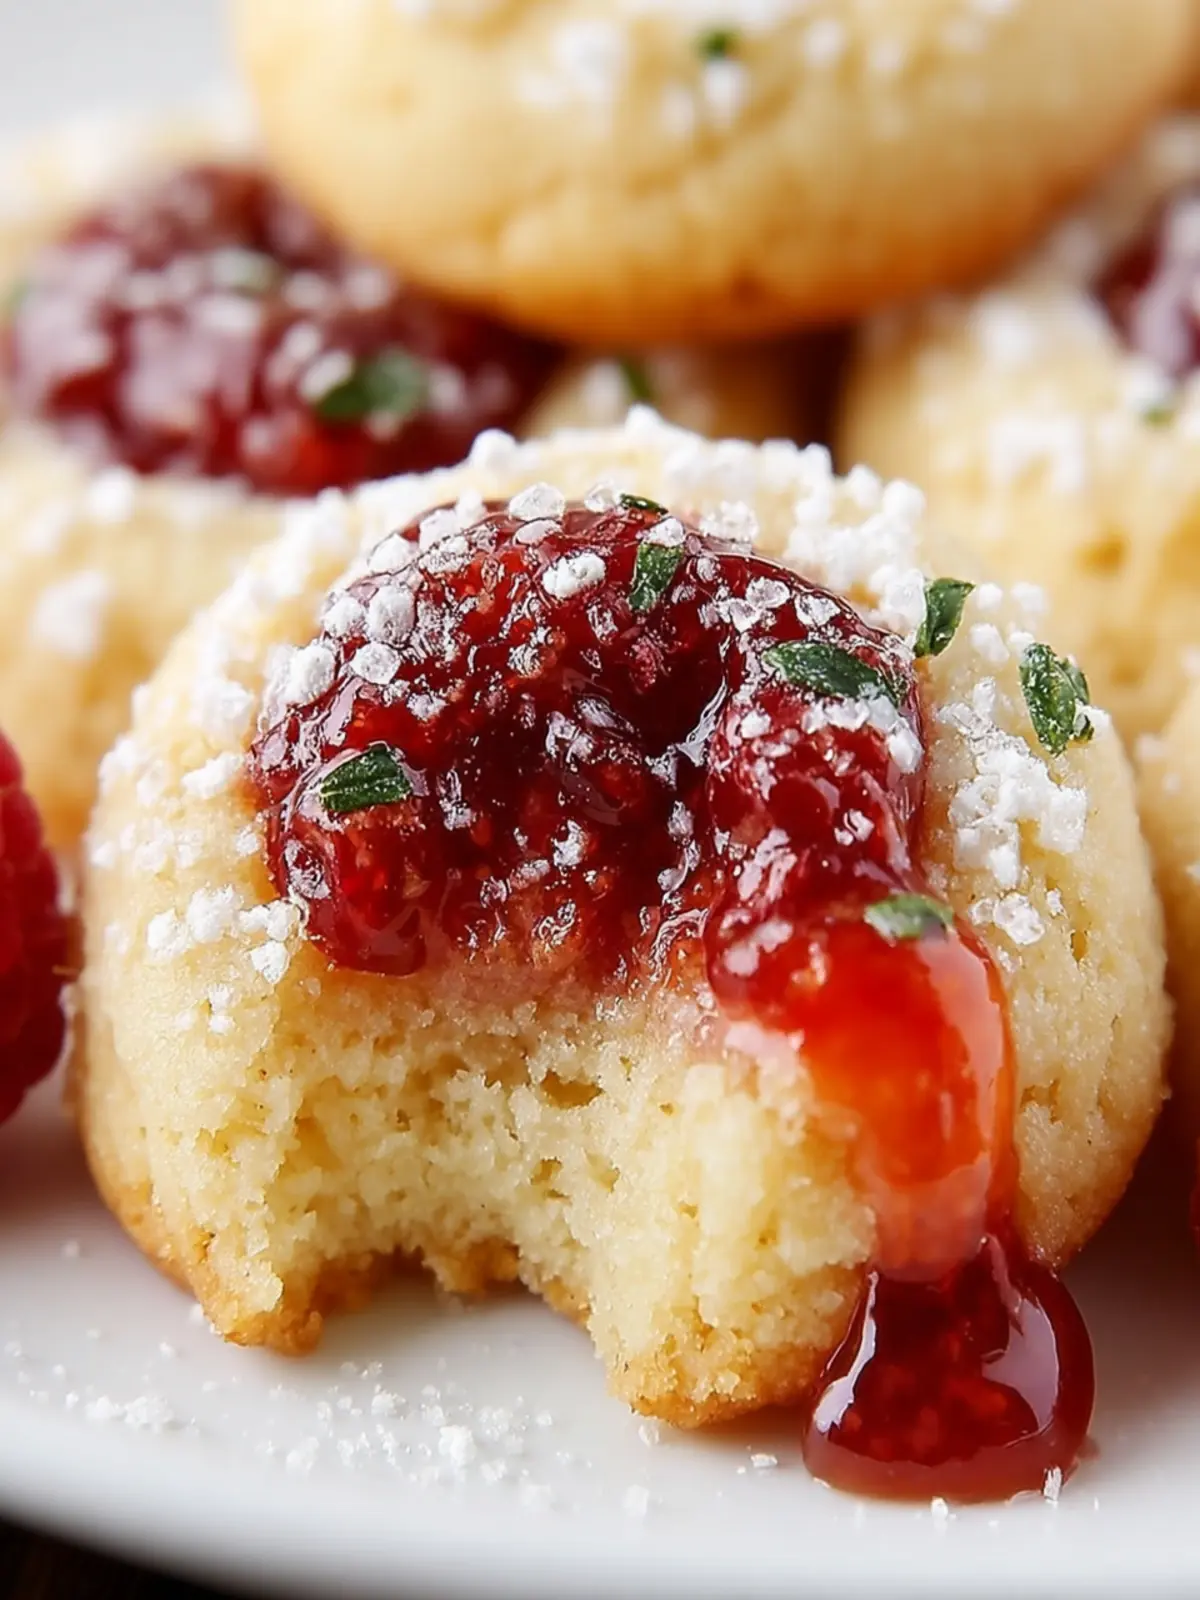
Raspberry thumbprint cookies are not just a dessert; they embody a little piece of nostalgia that takes us back to simpler times, reminding us of the joy found in baking with loved ones. Picture this: the rich aroma of butter and sugar wafts through the house, mingling with the sweet-tart scent of fresh raspberries. This delightful combination makes raspberry thumbprint cookies a beloved treat for many.
These cookies stand out not only for their vibrant color but also for their delightful texture—a slightly crisp exterior giving way to a chewy center, crowned with a luscious dollop of raspberry jam. They are perfect for any occasion, whether you’re celebrating a birthday, hosting a holiday gathering, or simply indulging in a cozy night at home with a warm cup of tea.
What makes Raspberry Thumbprint Cookies so special?
Several factors contribute to the charm of raspberry thumbprint cookies.
- Flavorful Duo: The union of buttery cookie and fruity filling creates a harmonious balance. There’s something magical about the combination of sweetness and a hint of tanginess that makes these cookies irresistible.
- Versatility: While raspberry is a popular choice, you can easily switch things up with other fruit jams or preserves. This adaptability means you can experiment based on what you have on hand or your personal favorites.
- Personal Touch: Thumbprint cookies are an excellent way to get creative in the kitchen. You can shape the cookies to your preference, influencing both their appearance and taste—this is YOUR cookie creation!
- Sharing the Love: Baking and gifting a batch of raspberry thumbprint cookies not only spreads joy but also nurtures connections, making them a thoughtful surprise for friends or family.
Whether you’re a seasoned baker or new to the kitchen, raspberry thumbprint cookies are a delightful project that brings delicious results. Let’s dive into the recipe and create some mouthwatering memories!
Key Ingredients for Raspberry Thumbprint Cookies
Creating raspberry thumbprint cookies is a delightful experience, with each ingredient adding to the charm of these treats. Let’s explore the key components that make this cookie recipe shine.
Butter: Starting with room temperature butter is essential. It provides the rich, creamy foundation that gives the cookies their flakiness and marvelous texture. I often opt for unsalted butter, allowing me to adjust the salt to my preference.
Sugar: Using a combination of granulated sugar and brown sugar enhances the depth of flavor. The granulated sugar contributes a crispiness, while brown sugar brings a moist, chewy quality to each bite.
Eggs: One egg is all you need to bind the ingredients beautifully. It adds moisture and richness, creating a tender cookie that practically melts in your mouth.
Flour: All-purpose flour serves as the primary structure for these cookies. It’s versatile and creates the perfect base to hold the raspberry filling and keep the cookie form.
Raspberry Jam: The star of the show! A thick, quality raspberry jam not only adds the classic thumbprint but also a burst of sweet-tart flavor that complements the cookie perfectly.
When you gather these ingredients, you’re just a step away from baking the most irresistible raspberry thumbprint cookies. Happy baking!
Why You’ll Love This Recipe
If you’re searching for a delightful treat that perfectly balances sweetness and tanginess, raspberry thumbprint cookies will immediately charm you. This recipe has become a personal favorite in my kitchen, especially during the summer months when fresh raspberries are abundant. The vibrant color and flavor of the berries not only elevate the visual appeal but also create a nostalgic experience that takes me back to childhood baking days.
Here’s what makes these cookies irresistible:
-
Easy to Make: The straightforward steps mean you can whip them up during a coffee break or to impress unexpected guests. You don’t need to be a baking pro to achieve that perfect jam-filled thumbprint!
-
Bursting with Flavor: The combination of buttery dough and tart raspberry jam is a match made in heaven. Each bite offers a satisfying crunch and a chewy center that will have you reaching for seconds.
-
Versatile and Customizable: While I love using fresh raspberries, you can easily switch up the jam for other fruits like apricot or strawberry, depending on your taste. This flexibility allows you to tailor these cookies to your preference.
Once you experience the warm, sweet aroma wafting through your kitchen, you’ll understand why these raspberry thumbprint cookies have a special place in my heart. Perfect for any occasion, they’re bound to become a staple in your baking repertoire.
Tips for Making Perfect Raspberry Thumbprint Cookies
Baking raspberry thumbprint cookies is like embarking on a sweet adventure—each bite offers the perfect blend of fruity tartness and buttery goodness. To ensure your cookies turn out magnificent, consider these friendly tips.
Choose Quality Raspberry Jam
Using high-quality raspberry jam is essential for achieving that signature burst of flavor. Opt for a brand that uses real fruit and has minimal additives. You can also make your own raspberry jam if you’re feeling adventurous, and trust me, that extra effort will pay off!
Don’t Overmix the Dough
When combining ingredients, mix until just combined. Overmixing can lead to tough cookies instead of the tender, melt-in-your-mouth texture you want. Remember, gentle hands make for soft cookies!
Create Perfect Wells
To make those signature thumbprint indents, press your thumb in the center of each cookie before baking. For a well-defined shape, ensure your thumb is slightly moistened to prevent sticking.
Cool Before Filling
After removing your cookies from the oven, allow them to cool on the baking sheet for a few minutes. This makes them more stable for adding your raspberry filling without crumbling.
By implementing these tips, your raspberry thumbprint cookies will become a hit at every gathering, with each bite leaving everyone wanting more!
Time Breakdown for Raspberry Thumbprint Cookies
Creating the perfect raspberry thumbprint cookies is a delightful journey through flavor and texture that truly pays off in the end. To make planning your baking session a breeze, here’s a breakdown of the time involved in crafting these delicious treats.
Preparation Time
Expect to spend about 15-20 minutes gathering your ingredients and mixing the cookie dough. Ensuring everything is prepped right will set the stage for deliciousness.
Chilling Time
Once your dough is mixed, let it chill for about 1 hour. This step is crucial as it firms up the dough, making it easier to work with and enhancing the flavors.
Baking Time
Baking will take approximately 12-15 minutes. Keep an eye on them; you want that golden hue without overbaking.
Total Time
All in all, from prep through baking, you’re looking at around 1.5 to 2 hours for these raspberry thumbprint cookies. With this timeline, the sweet aroma and irresistible taste will soon fill your kitchen!
Nutritional Facts for Raspberry Thumbprint Cookies
Baking raspberry thumbprint cookies isn’t just about satisfying your sweet tooth—it’s also a delightful way to enjoy a little treat that’s relatively balanced. Let’s break down what makes these cookies a guilt-free pleasure.
Calories
Each raspberry thumbprint cookie contains approximately 140 calories. This makes them a perfectly portioned snack without derailing your daily intake.
Protein
These cookies offer about 2 grams of protein each. While they aren’t a protein powerhouse, they do provide a small boost, making your treat a tad more satisfying.
Sodium
With only around 60 mg of sodium, raspberry thumbprint cookies are a low-sodium option, which means you can indulge without worrying too much about your sodium levels for the day.
Enjoy your baking! Each bite not only treats the palate but also keeps an eye on the numbers.
FAQs about Raspberry Thumbprint Cookies
Making raspberry thumbprint cookies can feel like a delicious adventure in baking. But questions may arise along the way! Here’s some helpful insight to ensure you create the perfect batch.
How can I make my thumbprint cookies softer?
Achieving a softer texture for your raspberry thumbprint cookies often comes down to the ingredients and baking time. Consider reducing the baking time by a couple of minutes—just until the edges are barely set. Incorporating a bit more butter or using room-temperature ingredients can also help maintain that softness. Remember, letting them cool on the baking tray for a few minutes before transferring them to a wire rack can add to the chewy goodness!
Can I use other types of jam for this recipe?
Absolutely! While raspberry jam brings a delightful tartness, feel free to experiment with other flavors. Strawberry, apricot, or even a mix of mixed berry jams can create a unique twist on this classic recipe. Just ensure that the jam you choose is thick enough to hold its shape when baked.
What’s the best way to store leftover cookies?
To keep your raspberry thumbprint cookies fresh, store them in an airtight container at room temperature. They can last up to a week this way. If you need to store them for longer, consider freezing them. Just place a piece of parchment paper between layers in a freezer-safe container. When you’re ready to enjoy, let them thaw at room temperature, and maybe even microwave for a couple of seconds for that freshly baked taste!
Feel free to pull inspiration from these tips, and happy baking!
Conclusion on Raspberry Thumbprint Cookies
In the delightful world of baking, raspberry thumbprint cookies hold a special place thanks to their charming appearance and irresistible flavor. These cookies are not just a treat for your taste buds; they also bring a sense of nostalgia, often evoking memories of family gatherings or cozy afternoons in the kitchen.
As you indulge in these delectable bites, remember that the perfect balance of buttery dough and tangy raspberry jam is what makes them truly special. Feeling inspired? Grab your ingredients and start baking a batch today. You’ll find that these cookies not only satisfy your sweet tooth but also brighten your day with every bite. Happy baking!
Print
Raspberry Thumbprint Cookies
- Total Time: 44 minutes
- Yield: 24 cookies 1x
- Diet: vegetarian
Description
Delicious raspberry thumbprint cookies with a hint of thyme.
Ingredients
Scale
- 1 cup unsalted butter (softened)
- 2 cups All-purpose flour
- ⅔ cup granulated sugar
- 1 tsp lemon zest
- 2 large egg yolks
- 1 tsp vanilla extract
- 1 tsp almond extract
- 1 Tbsp chopped fresh thyme (or use fresh chopped rosemary)
- ½ tsp kosher salt
- ¼ cup raspberry preserves
- Garnish: powdered sugar
Instructions
- In a bowl or stand mixer, beat the butter, sugar, and lemon zest until creamy and smooth, about 3 minutes.
- Add egg yolks one at a time, mixing well in between. Beat in the vanilla and almond extract.
- In a medium bowl, whisk together the flour, thyme, and salt. Gradually add the flour mixture to the butter mixture and beat until combined.
- Refrigerate the dough until it’s firm, about 30 minutes or so.
- Preheat oven to 350 degrees F. Line 2 large baking sheets with parchment paper.
- Roll the cookie dough into 24 balls and place them 2 inches apart on the baking sheets. Using your thumb, press into the dough making an indentation into the center of each cookie.
- Bake the cookies for 10 minutes; remove from the oven and using a spoon or your thumb, press down in the center again.
- Fill each center with ½ teaspoon of the raspberry jam, being careful to not overfill.
- Return the baking sheets to the oven for about 4 minutes and bake the cookies until they are lightly browned around the edges.
- Keep the cookies on the pan for about 2 minutes, then remove to wire racks and allow to cool completely before garnishing.
- Lightly sprinkle the cookies with powdered sugar & serve!
Notes
- For a different flavor, try using chopped fresh rosemary instead of thyme.
- Ensure the butter is softened to room temperature for best results.
- Prep Time: 15 minutes
- Cook Time: 14 minutes
- Category: dessert
- Method: baking
- Cuisine: American
Nutrition
- Serving Size: 1 cookie
- Calories: 150
- Sugar: 8g
- Sodium: 60mg
- Fat: 8g
- Saturated Fat: 5g
- Unsaturated Fat: 3g
- Trans Fat: 0g
- Carbohydrates: 18g
- Fiber: 0g
- Protein: 2g
- Cholesterol: 40mg